Issuance campaigns
How to send a client's users their credential instructions, announcements, reminders and expiry warnings, and issue their credentials in bulk, for clients that use Microsoft Entra Verified ID.
Written By Chris Scaminaci
Last updated About 1 hour ago
Microsoft Entra Verified ID works only for callers who already hold a credential, and enrolling them one at a time during calls does not scale. An issuance campaign is the bulk route: it e-mails the users you list instructions to add their credential to Microsoft Authenticator, can remind the ones who have not, can warn the ones whose credentials are about to expire, and can issue the credentials as it sends.
Campaigns apply to Verified ID only. Authenticator step-up needs nothing rolled out to users in advance, so a client that uses it needs no campaign.
Before you start: you need the Administrator or Identity Verification Admin role, Verified ID set up, and a client that is enabled and uses Verified ID. To use Include Credential Issuance, the credential contract must exist. To send by e-mail you also need an SMTP profile, on the Configuration tab or for this campaign.
Open the screen with Campaigns on the management screen, or go to /settings/identity-verification/campaigns.
Read the campaign list
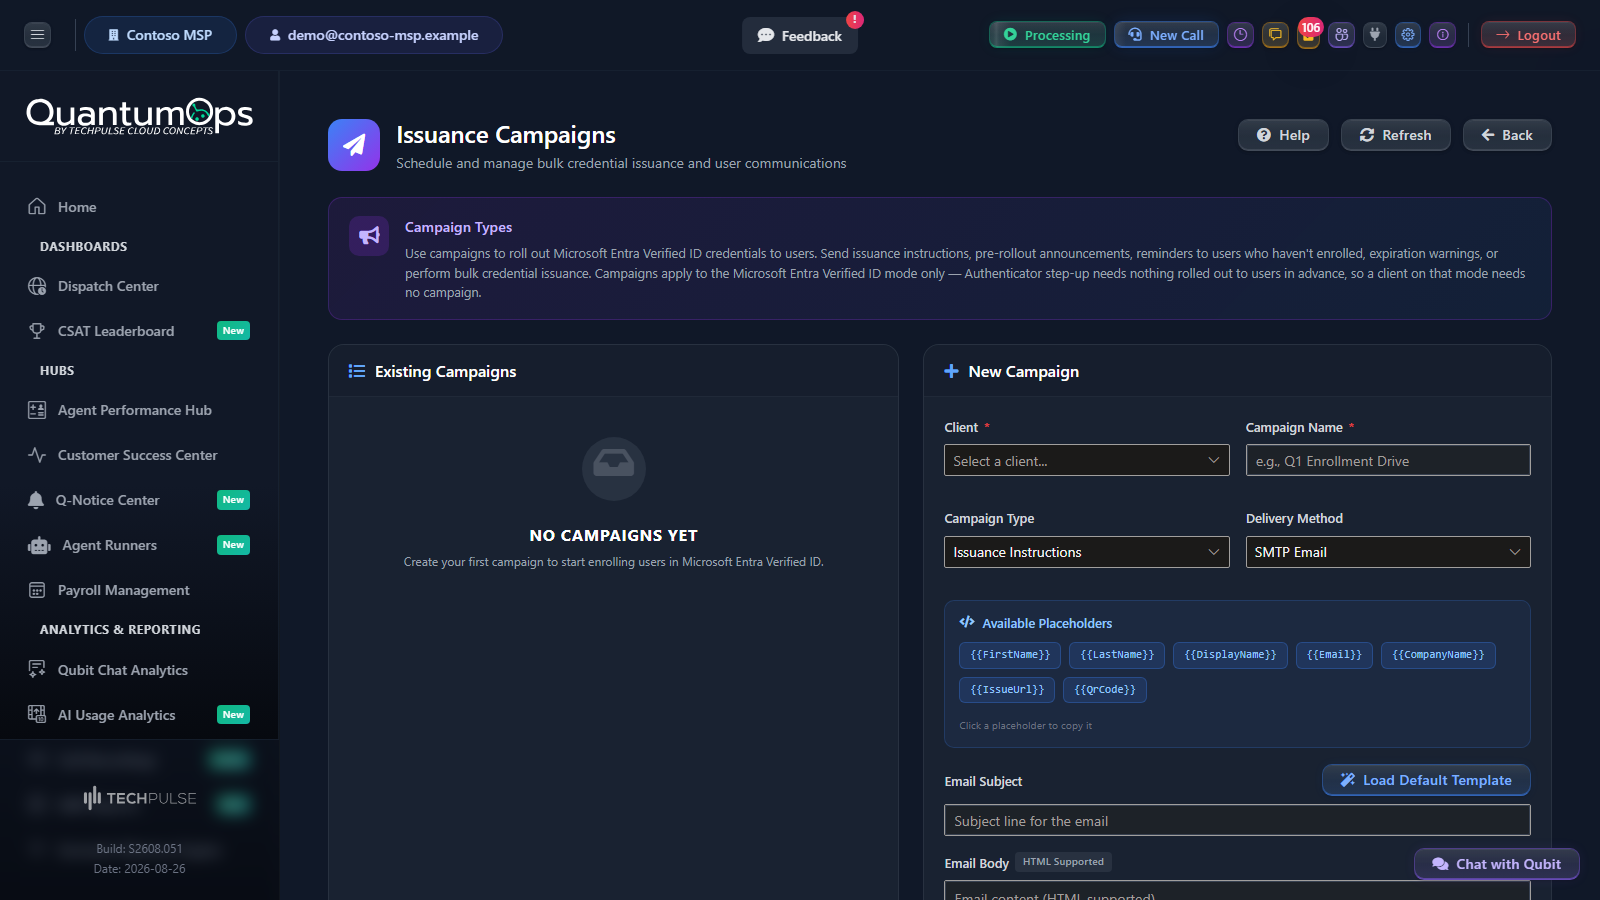
The screen has the campaign list, Existing Campaigns, on the left and the editor on the right. The header has Help, Refresh and Back.
Each campaign is a card with its name, its status, its scheduled time or "Not scheduled", a count such as "12 / 40 sent", and a count of failures when there are any. The status is Draft, Scheduled, Running, Completed or Failed. The icons on a card edit, run and delete the campaign. Use Refresh to see the latest counts.
Campaign types
Placeholders
Placeholders in the subject and body are replaced for each recipient. The editor lists them under Available Placeholders, and clicking one copies it.
{{IssueUrl}} and {{QrCode}} are filled only when Include Credential Issuance is on. Otherwise the placeholder text itself is sent, so remove both from a message that does not issue a credential. The default Issuance Instructions, Enrollment Reminder, Expiration Warning and Bulk Issuance templates contain them.
Create a campaign
- Choose the Client and enter a Campaign Name. Both are required. The client decides whose users the campaign is for and which sender name recipients see.
- Choose the Campaign Type.
- Choose the Delivery Method. SMTP Email sends from your mail server and is the method to use for a list of addresses. Halo Email Action and Halo Ticket Note deliver through an existing HaloPSA ticket, so each recipient has to be attached to a ticket. A plain list of addresses has no ticket, so those messages are not delivered.
- Check the sender line. Once you pick a client, the editor shows "Recipients see this campaign as coming from" followed by a name. When no white-label brand applies to the client, the name is the neutral "IT Support", and the screen notes that this is the intended result, not a fault. For a client that belongs to a white-label partner, the name is the partner's display name from their Identity Verification policy profile.
- Write the message in Email Subject and Email Body, which accepts HTML, and add placeholders where you want each person's details. Choose Load Default Template for a ready-made subject and body for the type you chose. The button appears when a type is selected and the subject is empty, and choosing a type while the subject and body are empty fills them in for you.
- Enter the Recipients: e-mail addresses separated by commas, semicolons or new lines. Duplicates are removed, and entries without an @ are ignored.
- Set the options.
- Include Credential Issuance creates a credential issuance request for each recipient as the message is sent, which is what fills
{{IssueUrl}}and{{QrCode}}. When the client's directory has a photo for the user, the credential includes it, so that Face Check can match. A recipient whose issuance fails is not sent the message, and counts as failed. - Test Mode sends everything to the Test Recipient Email you enter instead of the real recipients. Use it first on any campaign whose text you have edited, and to confirm that your mail profile delivers. It still creates an issuance request for the test address when Include Credential Issuance is on.
- Include Credential Issuance creates a credential issuance request for each recipient as the message is sent, which is what fills
- Optionally set Scheduled Date/Time in your local time. A campaign with a time is saved as Scheduled and starts by itself. QuantumOps checks for due campaigns about every five minutes, so it can start a few minutes after the time. A campaign without a time is saved as Draft, and you start it with Run.
- Choose the mail profile under SMTP Settings. Leave Use Global SMTP Settings ticked, as it is by default, to send through the profile on the Configuration tab (see Set the mail profile for campaigns), or untick it and enter a profile for this campaign: SMTP Host, Port, Use SSL/TLS, Username, Password, From Address and From Display Name. The profile on the Configuration tab is sent without a password, so a mail server that needs a username and password must be entered for each campaign. If you leave the From name empty, the sender name from step 4 is used.
- Choose Save Campaign. Clear empties the editor.
Saving a campaign in Test Mode keeps only the test address as its recipient list. To send to the real recipients, untick Test Mode and enter the recipients again before you save.
Run, edit and delete a campaign
- Run starts a draft, scheduled or failed campaign now. It is disabled while the campaign is Running. When it finishes, the campaign is Completed if at least one message was sent, and Failed if none was. Run does nothing to a Completed campaign. Editing one and choosing Save Campaign returns it to Draft (or Scheduled if it has a time) with its old counts, and Run then sends it to its recipients again, so create a new campaign to write to more people.
- The edit icon loads a campaign into the editor under Edit Campaign. Change it and choose Save Campaign.
- The bin icon deletes a campaign straight away, without asking you to confirm.
What your clients' users receive
Each recipient gets the message you wrote, from the sender name shown in the editor. With Include Credential Issuance on, it carries their own link and QR code. The default templates tell them to open Microsoft Authenticator on their phone, open the link or scan the QR code, and follow the prompts to add the credential. Once it is added, they can use it to verify themselves when they contact your helpdesk.
A sensible order
- Confirm the client is enabled and uses Verified ID (Clients and per-client policy).
- Send a Pre-Rollout Announcement, so the enrolment message is not the first they hear of it.
- Send Issuance Instructions with Include Credential Issuance on, in Test Mode first, then to the real list.
- Send an Enrollment Reminder to the users who still have no credential; the Credentials tab shows who has one (Credentials and the verification log).
- Send an Expiration Warning before credentials lapse. Credentials are marked Expired automatically once their expiry date passes.
Related
- Clients and per-client policy: enable a client before you write to its users.
- Sandbox, configuration and HaloPSA integration: the Sandbox and the organisation-wide settings.
- Issuing credentials and supervised overrides: issue a single credential during a call instead.
Was this helpful?
Still need help? Ask the team