Taking a call
Use the Call Taking screen to identify a caller, see their history, describe the issue and finish the call with a ticket, a link to an existing ticket or an outcome.
Written By Chris Scaminaci
Last updated About 2 hours ago
The Call Taking screen is for a call that is happening now. It helps you find out who is calling, what they and their organisation have open with you, and it ends with a ticket, a link to a ticket that already exists, or an outcome.
Before you start: the Call Center Operations module must be on for your organisation (it is on unless it has been turned off), and you need the Administrator, Service Desk Manager, Dispatcher or Technician role.
This section covers taking a call (this page, Call scripts and creating the ticket, Building call scripts, Call Taking settings and Connecting your phone system) and what happens to the recording afterwards (Call recordings, Matching your own recordings and Call recording settings).
Open the screen
Select New call in the header. The screen opens in its own browser tab, without the QuantumOps sidebar. On a phone, select the three-dot button in the header (More actions), then New call.
Your phone system can also open the screen for you when a call rings, with the caller's number already filled in. See Connecting your phone system. If you work in the browser extension, its Call tab does the same job in the side panel (see Call tab).
The screen can also be framed inside a HaloPSA tab. It checks your sign-in every few minutes. If your session has ended it shows Session Expired; select Log In Again to carry on.
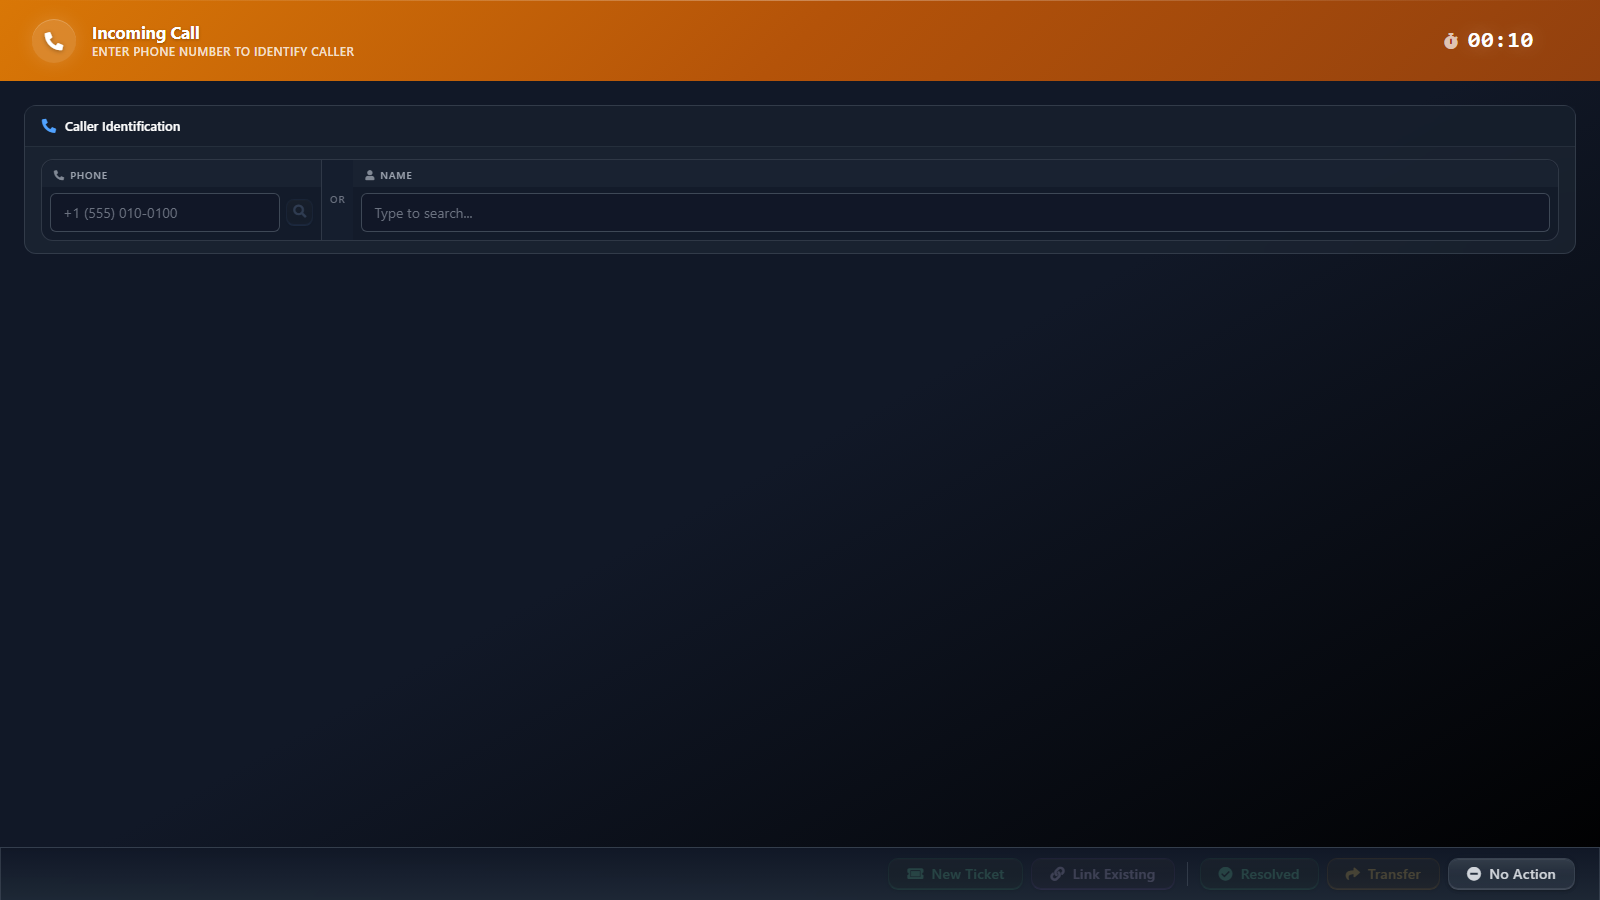
The header bar shows Incoming Call until a caller is chosen, then Caller Identified, VIP Contact or High Risk Client, with the organisation's name underneath. A timer runs from the moment the screen opens and starts again when you select Start New Call. When your phone system passes the answering agent, the agent's name appears under AGENT.
Identify the caller
Use the phone or the name field. Both are in the Caller Identification card.
- To search by number, type it in the Phone field and press Enter or select the search button.
- To search by name, type at least two characters in the Name field. Results appear as you type, each with the person's organisation and site and a VIP badge where one applies. Use the arrow keys and Enter, or click a result.
- Choose the right person.
- One match: select Confirm.
- Several matches: the list is titled Multiple Users Found - Select One and shows each person's organisation, e-mail address, phone number and how many tickets they have open. Select the right one.
- No match: the screen says Caller Not Found by Phone and lists what it tried. Search by name, or select Continue Without Identification to take the call as Unknown Caller.
A phone search never picks a person for you. It looks at the phone numbers on user records first, then at tickets from that number in the last seven days, then at contacts of linked white-label partners. A contact that belongs to a linked partner shows a badge with the partner's name (or Partner); point at it to see Contact from linked partner instance.
Once someone is chosen, the card heading shows Identified and a toolbar replaces the search fields. It shows the name, organisation and preferred phone number, with VIP and High Risk badges where they apply. Select Change to go back and pick someone else. This clears what you entered for the call: the issue text, similar incidents, the AI recommendation and any script answers.
Save the caller's number to their record
If you found the caller by name, and the number you typed in Phone is not the one on their record, the screen asks Save {number} to user? Choose where it goes (Work, Work Mobile, Home or Home Mobile) and select the save button. QuantumOps writes the number to that person's HaloPSA record, so the next call from that number finds them. The screen confirms with a message such as Phone saved to Work Phone.
Verify the caller
Where the organisation has identity verification on, a verification panel appears in the toolbar. After a check, the toolbar shows the result, for example Caller verified with the time, or Caller NOT verified. Where it is off, the toolbar says Identity verification off for this client. See Verifying a caller.
See what you already know
Once a caller is chosen, three panels show their history.
A caller with no organisation shows No organization linked in the last panel.
Selecting a ticket in User's Tickets, in Organization Tickets or in the similar-incidents list links the call to that ticket straight away and opens the ticket in HaloPSA in a new tab. There is no confirmation step, so check the number first. Use it when the caller is reporting something that is already open: that is how several callers about one outage end up on one ticket.
Describe the issue
Type what the caller tells you in Issue Description.
- Find Similar looks for incidents that resemble your text. It needs at least 10 characters. After 10 characters, the search also runs by itself as you type and opens a list under the card. Each result shows its number, whether it is open or closed, how close the match is (Very Similar, High Match, Similar or Related), its team and its age. The list says No similar incidents found when there are none.
- AI Triage needs at least 15 characters. It opens an AI Recommendations card with a suggested team, type, impact and urgency and a confidence percentage. Select Why? to read the reasoning for the team.
- In the AI Recommendations card, the Callback: field holds the number to call back (it starts as the caller's number). It is added to the top of the ticket details. Select Apply & Create Ticket to open the create-ticket dialog. Your issue text goes into the ticket, and you can change every field in the dialog.
Run a call script
If your organisation has call scripts, the script window opens by itself when you choose a caller. Select Run Script to open it again. After you finish, the toolbar shows Script Done. If you skip the script, Run Script is not offered again for that call.
Scripts guide the questions you ask and can fill in the ticket for you. See Call scripts and creating the ticket.
Finish the call
The buttons along the bottom end the call. They need a chosen caller: New Ticket, Link Existing, Resolved and Transfer are greyed out until you pick one, and No Action does nothing until then. If the caller cannot be found by phone, select Continue Without Identification (it appears after a phone search finds nobody) and take the call as an unknown caller.
Link Existing is the right choice for the second and third caller about one outage. Using New Ticket for each of them gives you several tickets for one incident.
After Call Completed, select Start New Call to clear the screen for the next caller, or Close to stay on this one.
If something goes wrong
- Ticket Creation Failed appears with the reason. Select Try Again to reopen the create-ticket dialog, or Close. If the message says the ticket type or team is not configured, an administrator needs to set the defaults in Call Taking settings.
- Session Expired means you were signed out. Select Log In Again.
Related pages
- Call scripts and creating the ticket: the script window and the create-ticket dialog.
- Connecting your phone system: open this screen from a ringing call.
- Call Taking settings: what administrators can change here.
- Verifying a caller: proving the caller is who they say they are.
Was this helpful?
Still need help? Ask the team